5 Tips to Master the Wet Look and Extend Summer
This publication is also available in: ![]() Français
Français ![]() Deutsch
Deutsch ![]() Italiano
Italiano ![]() Español
Español ![]() English (US)
English (US)
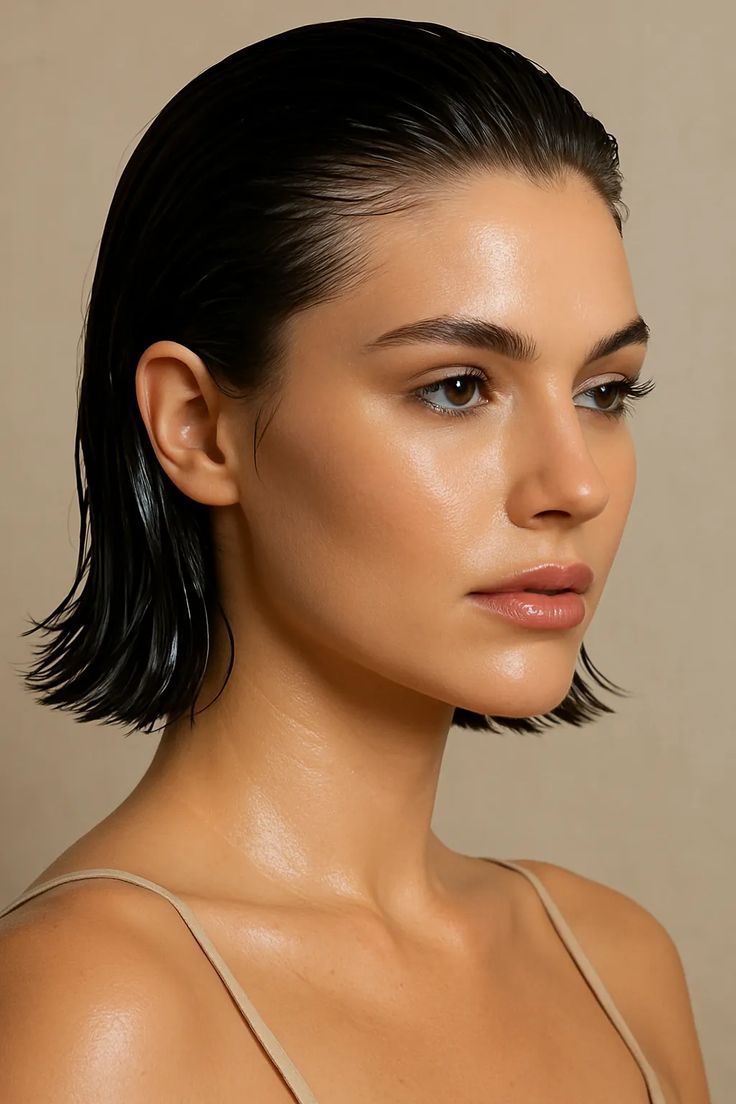
Have you envied the Wet Look of models on the runways? But when it comes to recreating it at home, the result sometimes looks more like greasy hair than the elegance of a mermaid emerging from the water. Stop right there: mastering the wet look is no small feat. Yet, it is the hairstyle that gives a sun-kissed effect, the one that extends summer right into the fall. Shiny without being greasy, sophisticated while remaining fresh and modern, it can be worn both at the office and in the evening.
With the right products, a bit of technique, and some pro tips, you can transform this style into a true beauty asset. Ready to shine like after a dip in the sea, but without sand in your hair? Follow the guide: here are 5 simple and effective tips to achieve the wet look without any missteps.
1. Prepare your hair thoroughly
The first step before even thinking about the result of your wet look: preparation. And preparation means care.
So hop into the shower for a good shampoo and mask, and then we move on to my favorite step: rinsing with apple cider vinegar. The smell isn’t amazing, but it’s worth trying for added shine and strength to your hair. Finish off with the mildest leave-in conditioner possible to continue protecting and nourishing your hair as it dries.
2. Choose the right products
It’s impossible to achieve a perfect wet look without using the right products… that suit your hair. Make sure to educate yourself based on your hair type, needs, and length. You’ve got it, the choice of products is crucial depending on the nature of your hair.
- Fine or straight hair:
Opt for a lightweight gel with strong styling power that adds volume and shine without a stiff finish.
- Wavy or curly hair:
Start with an anti-frizz serum or a nourishing leave-in, then add a touch of gel to hold everything gently in place.
3. Apply and style with precision
Alright, the fun part begins! Your hair is clean, a bit damp, and it’s time to get to work!
In this hairstyle that doesn’t allow for any stray hairs, I recommend using an eyebrow brush to “stick” down any rebellious strands that might try to escape.
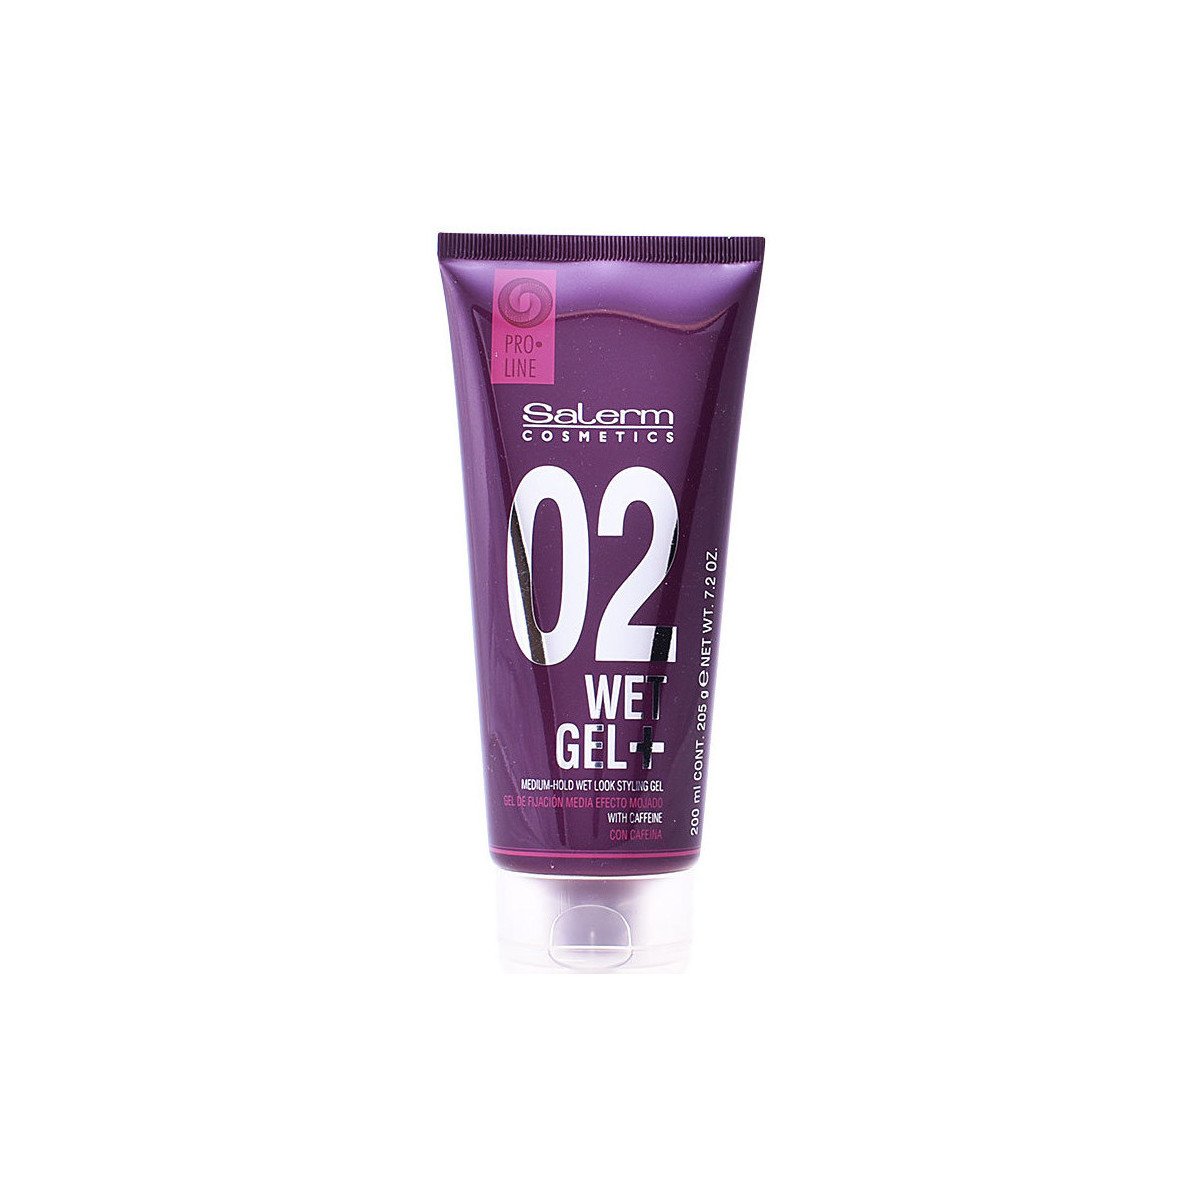
Start by generously distributing the gel (or the gel + oil mix) from roots to tips. It’s this mixture that you apply to your hair that will create the wet effect.
You are, of course, free to choose the hairstyle you want. Just know that it’s recommended to style your hair back to keep your face clear. It would be a shame to end up with a big wet strand in your eyes.
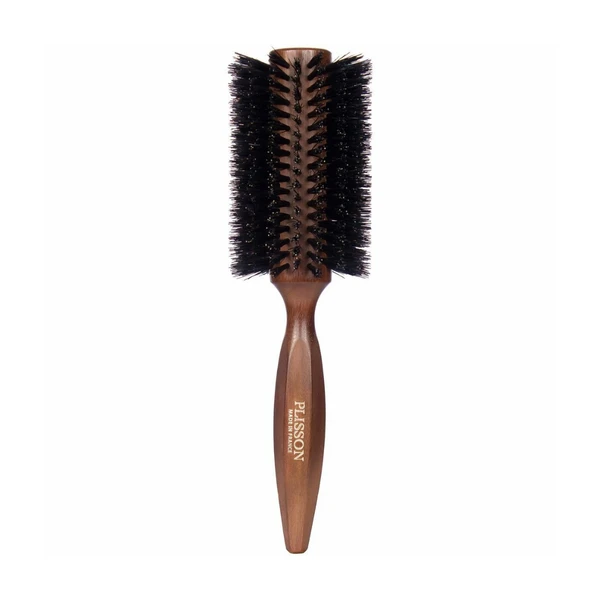
Always style backward with an appropriate brush: a bristle brush, like one with boar bristles for a smooth and flawless finish, especially if you’re going for a short bob. If on the other hand, you enjoy playing with a slightly more deconstructed effect, opt for a wide-toothed comb, which will be less precise than a brush.


4. Extend the shine with finishing touches
The gel is the main product for the wet look but isn’t enough to provide that “wet” touch in the long term. To extend the shine, consider:
- A humidity-resistant spray, especially in summer when it’s hot or when you’re dancing the night away.
- A shine spray to add gloss to the lengths.
- A shiny hairspray to tame rebellious strands.
5. Maintain and extend the style effectively
Good news: with a few clever moves, your wet look can last much longer than just a night out, even though generally, you might want to avoid sleeping with gel in your hair.
- However, if you want to get your hair used to the wet look, consider changing your pillowcase to satin or silk. Silk is a smooth material that clings less than cotton. It will reduce friction during the night and prevent frizz upon waking.
- Always have a shine spray or a lightweight gel handy when you’re out to quickly refresh your glow between appointments.
- Once your wet look is in place, don’t touch your hair… even if it’s tempting, and resist the urge to constantly restyle it.
Image feature: Kim Kardashian, © Getty Images